Motherhood, Blogging, and Avoiding Mommy Blogging

Well, it’s true. I’m a mommy now. And I know what you’re thinking. Oh great, another mommy blogger! Just what the internet needed! Well, if you’re bracing yourself for lots of chubby-faced pictures (of course I refer to Lucy’s cubby face, not my own), you can brace yourself no longer and rest assured. I’ve got plans to continue blogging, but not as a mommy blogger! Sure, my blog has some evolving in its future, that much is unavoidable. But let’s talk a little bit about what my plans are for Making Nice in the Midwest.

I’ve always said I wouldn’t let the other parts of my life fade away into oblivion, as motherhood encroaches and makes its best attempts at pushing away my identity. No sir! I would keep up my hobbies, maintain my social life, and be fabulous all the while. But I can’t avoid the fact that my days are spent trying to sooth a screaming baby, keeping up with laundry, catching up on sleep, trying to somehow prepare food for our family, and attempting to keep our house somewhat tidy in the process. Oh, and that little thing called personal fashion? It’s a bit difficult to focus on when you’re covered in spit-up and your breasts are the size of cantaloupes  Or watermelons, even! All of these things aren’t very exciting or glamorous, and probably not interesting to you guys at all. They’re very draining, though, and leave very little energy for much else. I had no idea this is what I should have expected from early motherhood!

Things should calm down a bit as Lucy settles into more of a regular sleep schedule, and I figure out how to balance things, but in the meantime it makes it difficult to find too much else to blog about. The truth is, cranking out new ideas and making time to fulfil them just doesn’t come as easily as it did in my pre-motherhood days. And I’m not planning on burning the candle at both ends, or being less of a mother to try to create a cutting edge blog.

I understand that many of you aren’t much interested in baby things. At all. Two years ago, I was that blog reader who quickly scrolled by the baby posts from some of my favorite bloggers. I just wasn’t interested. And to be honest, I’m still not super interested in baby talk. Though, there are those of you who are interested in seeing how Lucy is growing, what she’s wearing (diapers and sleepers so far! ha!), and how we’re getting along with a new baby in the house. So I’m really aiming to strike a balance.

In the past, I’ve always shared parts of my life on this blog, and now that Lucy is here, she is obviously a pretty big part of things. So, parenting talk and baby pictures will occassionally make an appearance here on Making Nice in the Midwest. But I’ll make sure to keep those kinds of posts sprinkled between the usual DIYs, fashion posts, and other fun stuff you’re used to seeing here.

Oh, and going along with the good mother bit…. I’ll be dialing back the blogging a little. I’ll still be here, of course, and I’ll still keep blogging. Just not every day as I was able to do in the past. And I hope you all will still follow along in the process!

DIY Gift Idea: Travel Dice Game

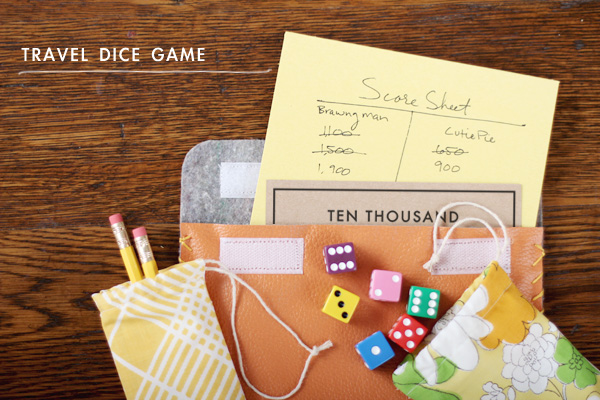
This year our family is keeping it low key for Christmas gifts, dialing down the number of gifts, and planning on making and finding unique and personal presents. Since we all love playing games as a family, I thought it would be fun to put together travel dice games for each couple. They’re special, useful, and can add a lot of fun to waiting rooms, half-times, and road trips.

My family’s dice game of choice is 10 Thousand, but we’re always arguing about points, and can never remember the rules! So, I thought, why not include the rules in the set? I’ve included the printable rules for download here, so you can make your very own travel 10 Thousand dice game!

  • scrap fabric in 2 coordinating prints
  • leather or vinyl in coordinating color to scrap fabric above
  • velcro
  • sewing machine
  • embroidery floss
  • embroidery needle
  • ribbon or twine
  • card stock
  • stack of construction paper
  • book clips
  • xacto blade or utility paper cutter
  • mod podge
  • paint brush
  • pencils or pens
  • scissors
  • 6 dice (I found my colorful dice at a teacher/school supply specialty store)
  • piece of chipboard
  • steel ruler

You’ll need two pouches for your travel game- one for the dice, and one for your writing utensils.

  1. Fold Fabric in half, and cut to size- one cut to the size of your writing utensil (plus about two inches extra length), and one big enough to fit your dice. The exact size is your preference. Just be sure to leave the fold on the bottom!
  2. Fold in the edges of the top of both layers of fabric, and iron them so that they will stay put.
  3. Now fold down the top of both layers twice, and hem along the very edge, so that you have created a pocket for your ribbon or twine.
  4. Thread the twine or ribbon through the pocket you’ve just made. I used a safety pin to make it easier to get the twine through.
  5. Leave enough ribbon or twine to pull through and knot to close bag. Cut the ends and tie them together in a tight knot.

Now it’s time to create your score sheet! This can be any size you want, but it should be at least 5.5″ x 8.5″ (this is the size of your printable rule sheet). You certainly don’t have to make your own, but why not? It doesn’t take long, and it’s kind of fun.

  1. Using book clips, clamp together your piece of chipboard to your stack of construction paper. Line them up on the grid of a cutting mat, and using a steel ruler and a sharp xacto blade, make a few passes with the blade to cut your stack to size. Make sure you keep your blade straight vertically.
  2. Keep the book clips on the stack of paper and chipboard, and paint one edge with mod podge. Make sure it’s thick enough that the edge is completely covered, but don’t let any of the mod podge drip! Allow it to dry 24 hours, and now you have a tearable pad of paper!

To neatly carry your dice game, you’ll need a case! This is where your vinyl, velcro, and embroidery supplies come in.

  1. Lay out your piece of vinyl or leather, and arrange the pad of paper and pouches you’ve made on top. Leave 3/4″ along the left and right side of the vinyl and fold the fabric over the pouches content to determine how much material you need to contain everything. Leave an additional 2 inches at the top for the flap.
  2. Cut out the vinyl/leather material, and round the edges of the top flap. I did this freehand, but you can certainly use a round object as a template!
  3. I used adhesive velcro and cut two piece (4 pieces once pulled apart) to the same size, and attached to the top and flap of the vinyl material, making sure the case could comfortably fit over the contents when closed. Then I pulled apart the velcro to sew each of the 4 pieces.
  4. Carefully machine stitch around the edges of each piece of velcro. The neater you make your stitchers, the prettier your case will be. You will need to stitch over the adhesive vinyl, because the adhesive itself is not enough to make the velcro stick to you material.
  5. Now, use a book clamp to keep your pouch secure while stitching the edges together with your embroidery floss. I used some extra chipboard as a barrier between the clamp and the vinyl, so it there would be no imprints.

Now all you need to do is print our your directions onto a sheet of 8.5″ x 11″ cardstock (in the color of your choice and fill the pouches with writing utensils and dice. I found some pretty colorful dice at a local teacher/classroom supply specialty shop called The Wise Owl.

Once you’ve neatly arranged everything inside the case, your dice game is ready for gifting! And if you’re extra ambitious, find the rules for your own favorite dice games (like Yahtzee) and include those too. So many possibilities!


Movie Monday: The Glass Bottom Boat 1966

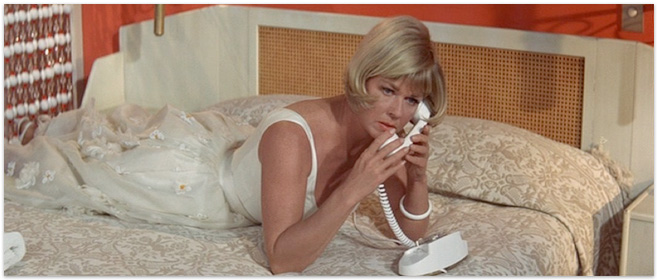
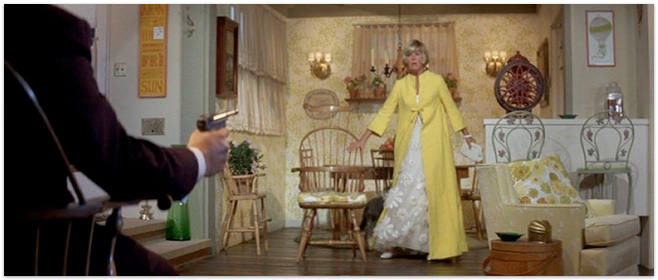
Jennifer Nelson (Doris Day) is a pretty young widow who spends her work days at an aerospace research facility (think: NASA) as a tour guide, warding off flirtatious menfolk left and right. Her most recent male annoyance turns out to be Bruce Templeton (Rod Taylor), one of the bosses of the facility, and pretty charming at that. Bruce and his business partner are ready to release a new innovation to aerospace research, something that the Russians are eager to get their hands on. But Mr. Templeton soon finds himself busy creating a fake project designed to woo Miss Nelson, who he has enlisted as his new assistant.

Mr. Templeton’s plan for romance seems to be working out just fine, as Jennifer finds herself falling for him and admiring his genius work in aerospace research. But through a series of hilarious misunderstandings, Mr. Templeton’s staff begin to suspect his new girlfriend of espionage. Trickery, hilarious spy games, and romance ensue as Jennifer finds herself caught up with the real spies, and Bruce has to defend her innocence and find a way to rescue her.

The Glass Bottom boat has a great cast of tried and true comedians at its helm, such as Paul Lynde, who coincidentally played the voice of Templeton the rat in Charlotte’s Web, and whose cross-dressing role in The Glass Bottom Boat is also a bit coincidental, considering Lynde’s role as an early(ish) Hollywood gay icon.

The plot is fairly fast paced, so don’t be surprised with within a matter of days, the characters find themselves head over heals in love (You mean that doesn’t happen in real life?) and involved in an international espionage incident. Doris Day entertains us with her wide eyed charm, fabulous wardrobe, and, of course, a classic rendition of Que Sera Sera (much more fun and light hearted than the version we see in The Man Who Knew Too Much). This is my favorite Doris Day film as far as her wardrobe and styling goes (her hair is exactly what I envisioned when I went for my last hair appointment!), and the set design is pretty great as well! This movie is loads of fun, and a treat for the eyes. I don’t think anyone can help liking it!

 Older