Wilma Flintstone Hair Tutorial

Wilma Flintstone Hair Tutorial

I always imagined that if I had a little girl someday, we would dress up as The Flintstones for Halloween. I enjoyed the show tremendously as a kiddo, and aren’t nostalgic Halloween costumes always the best? Whipping up the costumes was actually easier than I thought it would be. Sure, you can find Fred and Wilma Fintstone costumes online and in stores, but I wanted to save some money by putting them together myself. You can check out my Flintstones Family DIY Costumes post I did at Babble for more instructions. But the trickiest part is probably creating Wilma’s cartoon hair.

This Wilma Flintstone hairstyle took around 15 minutes to put together, and used two cans of extremely toxic orange hairspray. Yuck! But it wasn’t as difficult as I thought! If you follow me on Instagram, you may have already gotten a peek at my Wilma-do. But here’s the full tutorial for how you can do it yourself.


Wilma Flintstone hair tutorial

First I pulled aside a section of hair at the top front of my head and pinned it to keep it out of the way. Then I teased the rest of my hair with some hairspray and a bristle brush, focusing on the area on the top of the sides, where Wilma’s hair protrudes in the cartoon. Next I pulled my hair up in a ponytail holder at the top of my head. At this point I pulled some of the hair on the sides of my head out a little to accentuate the pointy cartoon look.

To create the bun, I used hairspray and a bristle brush and teased the hair that was in the ponytail. This created the body of the bun, so all I had to do was wrap the extra hair around the bun and pin it into place. All that was left was the front portion.

I pulled down the reserved hair at the front of my head and really went to town with teasing it into a big mass. This took a lot of hairspray and a bit of work with a bristle brush. Next, I smoothed it a little bit with the brush and began twisting it upward for the pompadour twist. I kept this hair loose, so I wouldn’t loose the body, and spiraled the twist inside of itself, pinning it into place with lots of bobby pins. Then I sprayed it with a coat of hairspray and smoothed it with the hairbrush.

The last step is covering the style with orange hairspray, which can be found in a costume shop or online here. Beware, guys, because this stuff is really toxic! I may have photographed myself in the bathroom, but in actuality I sprayed this outside and I probably should’ve used a breathing mask even still. You will want to cover yourself with a drop cloth of sorts, also, to avoid overspray getting on your clothing. While spraying, keep your sprays even and light. Then when you’ve finished, the overspray on your skin easily wipes off with a slightly damp cloth.

Check out the rest of our family’s costumes here at Babble! Lucy makes a pretty cute Pebbles, eh?


Flintstone Family costume DIY

Paisley’s First Big Girl Room

Cute and creative little girl's room

I’m learning quickly that it’s a bittersweet thing when kiddos grow up! But I’ve also learned that putting a brick on your child’s head doesn’t keep them from getting big! Just kidding. I haven’t tried that yet. (Does it work?) My friend Stephanie‘s daughter Paisley just turned four, and was reminiscing about when she got her first big girl bedroom makeover for her third birthday. She was so excited, and can you blame her?  She especially loved her pretty Ikea bed, and it looks like her stuffed friends do too!

Stephanie did a few of easy little projects that really add character to Paisley’s room, I thought you’d all be just as inspired as I am! Maybe I won’t be as sad as I thought I would be when Lucy turns three.

Cute and creative little girl's room

cute and creative little girl's bedroom

I wondered if the Swiss cross wall in Paisley’s room was a stencil job, but it turns out Steph hacked a decal idea she had loved by cutting little strips of black electrical tape and just sticking them to the wall! Genius! The tape hasn’t peeled after a year on the wall, so I’d say this DIY idea was a success.

The prints on Paisley’s wall are from Etsy artists and also Boom Boom Prints, a site where you can customize artwork for your exact needs. Check out that whale! I Love how the washi tape holding up the art adds the perfect quirky touch. Maybe not great for living room art, but perfect for a kid’s room! And because of the tape, the art can easy be moved around for a fresh look without worrying about holes in the wall.

Cute and creative little girl's room

Cute and creative little girl's room

I love that everything Stephanie and Noah selected for Paisley’s room is so affordable- the dresser is from Walmart, you guys! (Stephanie sanded and painted it.) The bedding and bed is from Ikea, the rug from Urban Outfitters, and the elements I particularly love are all handmade.

The idea of using a rugged, painted wooden chest as a night stand seems really special for a little girl to hide her treasures inside. Stenciling Paisley’s initial on the front is an added dose of cute! The hanging rod for clothes is a great use of vertical space and along with the tassel garland on the other side of the room adds an unexpected element of whimsy.

Great job, guys! Paisley’s such a blessed little girl. Check out more of Stephanie’s life at her blog Love, Life, Babies.

Cute and creative little girl's room

Cute and creative little girl's room


It’s Costume Time!

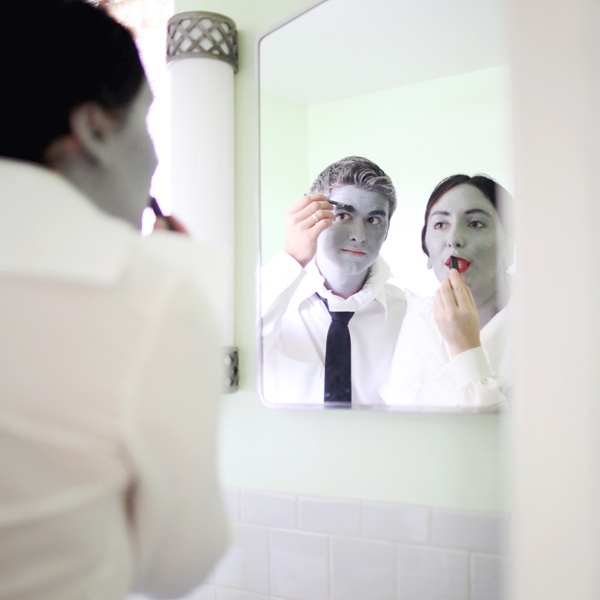
grayscale halloween costume

Don’t be alarmed. I know Phil and I look a little freaky here, but this was only the beginning of the most amazing costumes we’ve ever created! If you want to see the finished products, check out my post today at Babble. It was pretty cool seeing everyone’s mouth-agape reactions as we walked around Canton in costume! There were shrieks of amazement, cheers, honks, people asking for photos… needless to say, this was a Halloween costume worth repeating. And pretty easy to accomplish! Check it out here.

 Older