KITCHEN PROGRESS: Adding The Final Details

kitchen renovation Making Nice in the Midwest

You guys! We are SO close to being finished with this kitchen progress. I still have to add some details, such as the shelving on either side of the window, a door knob to the playroom, caulking in some places, and a shade for the window. But look! It looks so close to my final vision!

I wanted to share some special details about the nitty gritty stuff today. Things like, how I hid a wall switch inside a 2×10 board of my shelving wall, what kind of switches and outlets I’ve used, and how I patched the texture of my ceiling where we installed two hanging pendants.

kitchen renovation Making Nice in the Midwest

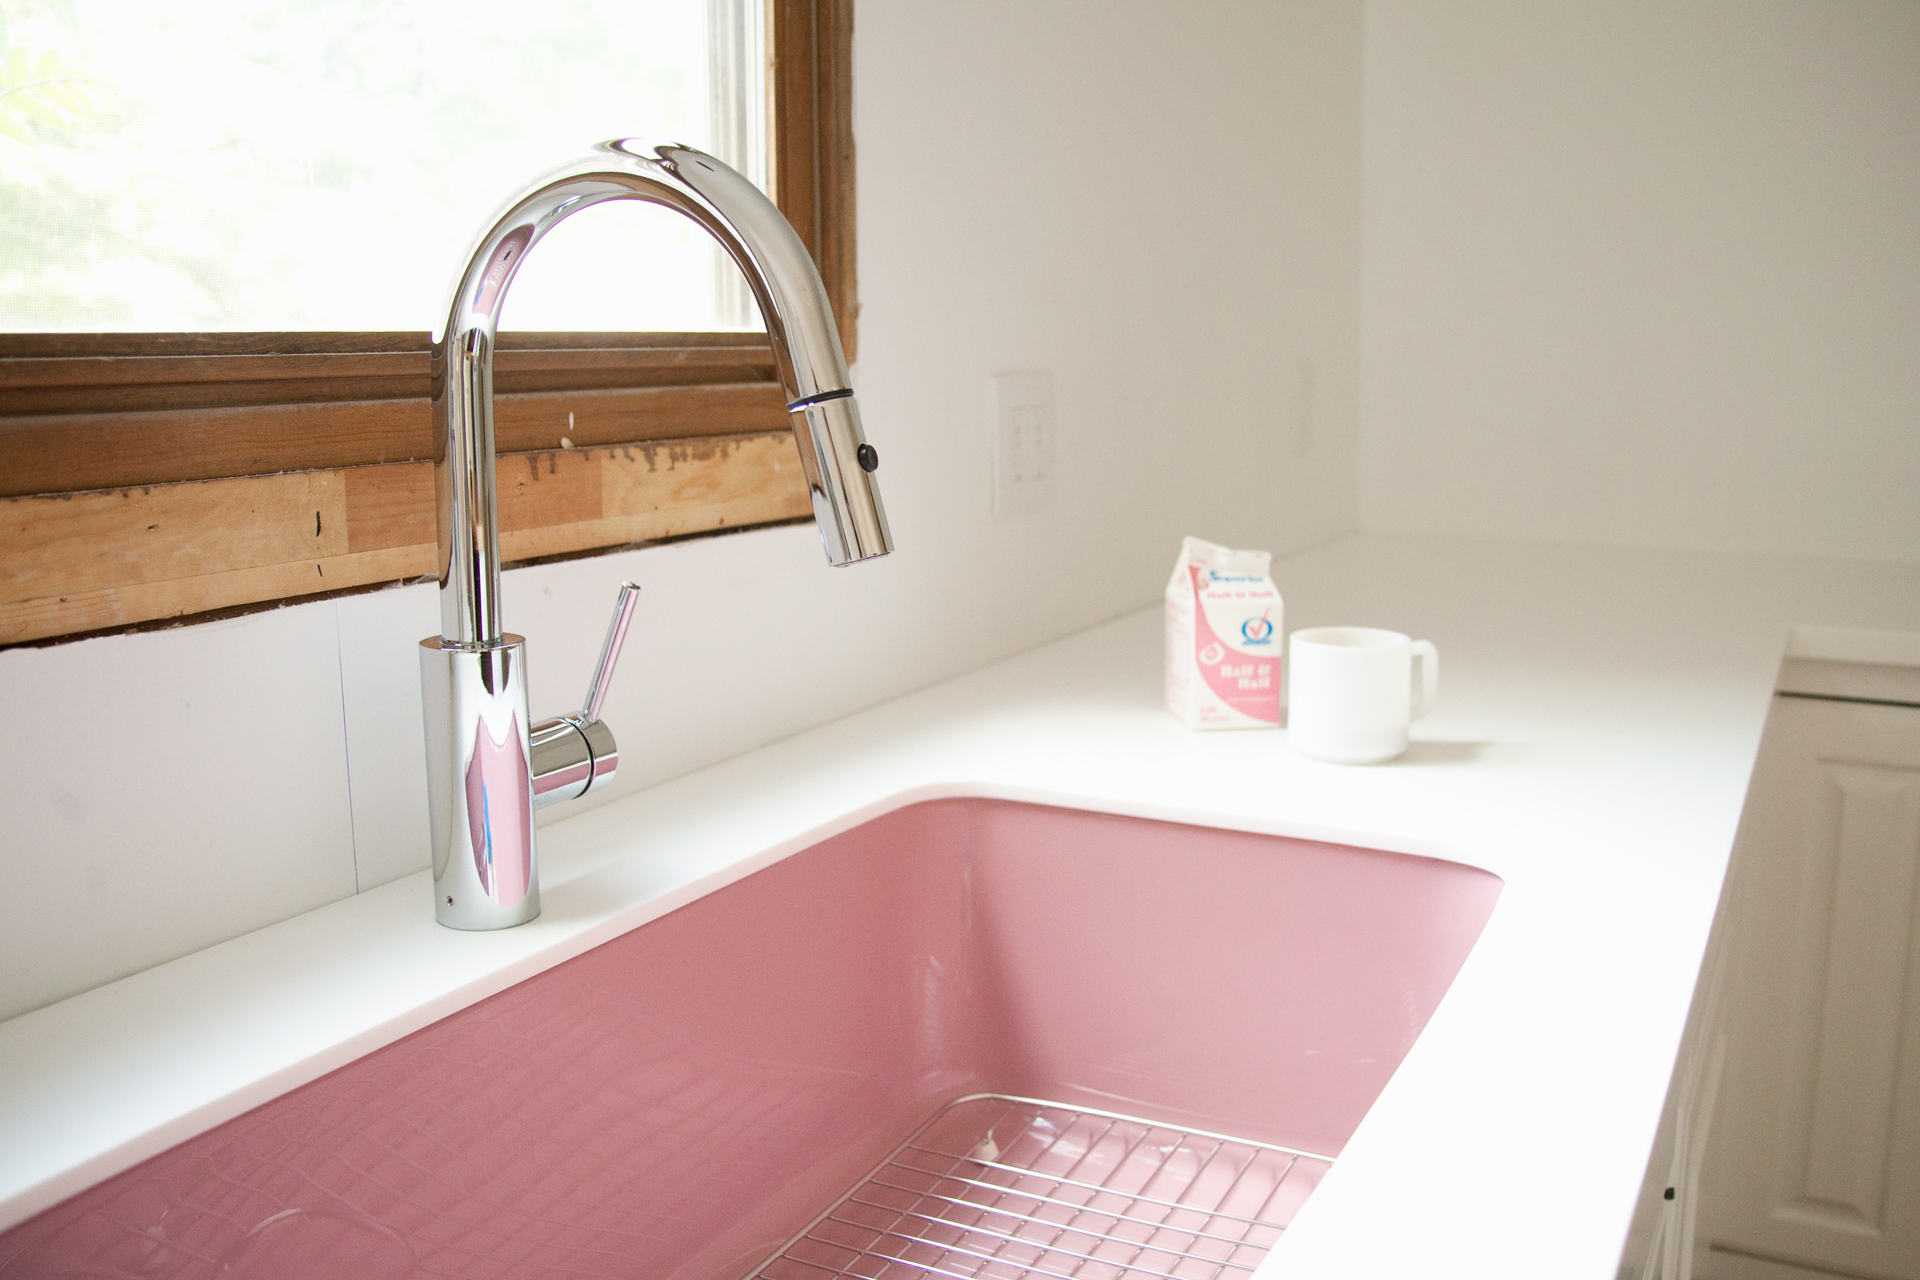
Now, let’s play a little game. It’s called spot the outlets. I have four outlets and two switches on the kitchen window wall, and am so pleased with how they fade away without making a visual statement at all. I used Legrand’s Radiant line of switches and outlets, and their wall plates are actually screw-free, so they look very minimal— to the point where you really have to look for them in photos. A blogger’s dream.

Replacing my outlets and switches wasn’t even on my radar when I began this process, but when all of the newer elements began to replace the old, I realized how dingy and outdated all of the old electrical fixtures looked by comparison. I’m so glad we replaced everything— these are the little things that make a big difference!

Legrand nightlight outlets

We also utilized some specialty items in the Legrand Radiant line, like outlets that have 3-setting nightlights which you can set to automatically turn on in dim lighting, wall chargers, and synced master/remote dimmer switches.

hide a switch inside a shelf

When I planned the shelving wall in the kitchen, I realized that I would be building shelves around the switches for the kitchen lights, which meant we would’ve had to reach our hands inside the shelves to turn on the light! Not a great idea. My dad recommended I use a shallow electrical box (like this one) and router a space for it on the outside of the shelf. Genius! He drilled a hole through the back of the shelf for the wires to enter the routered section, and now it looks like there is some kind of magic electrical situation going on. We covered the old box with a blank cover plate.

hide a switch inside a shelf


legrand radiant GFCI outlets

kitchen accessories

As we’ve been finishing up the details of the kitchen, I realized I need to make up my mind about a few final details. I decided to upgrade my door knob selection, and possibly my island stools as well. What do you guys think? I ordered an Emtek knob set for the playroom door and one for the pantry (pantry not shown in these photos), and I think the crystal and tumbled white bronze tie in well with the sophisticated feeling of my appliances and lighting, but also mimic the shape and style of my simple, modern wooden knobs. I also decided to do a white linen relaxed roman shade over the window, and got a few great baskets to put on my shelving wall. Still haven’t made my mind up about the stools though. Decisions, decisions! 

  1. Emtek tumbled white bronze and crystal passage knob set
  2. Xinh and Co Caña Baskets
  3. Relaxed roman shade
  4. Wooden cabinet knobs
  5. 24″ wooden counter stools

open shelving unit

Just for fun, I had to share a before and after— well, before and during picture! It’s from a slightly different angle, but when you’re taking before pictures of a space you’ve never photographed before, it can be difficult to know what the sweet spots will be for taking after photos. Oh well!

Kitchen Before

kitchen renovation Making Nice in the Midwest

I’ll share more photos of the shelving wall and other details as I begin to share more posts on the kitchen project at A Beautiful Mess. But for now, check out my post on how I built the hood vent and also my post about painting wood cabinets with chalk paint vs. latex paint.


kitchen renovation Making Nice in the Midwest

MATERIAL SOURCES

Wall paint: Benjamin Moore’s Super White
Cabinet paint: Annie Sloan’s Pure White
Lighting: Hinkley Congress collection
Wall tile: Home Depot
Tile grout: TEC Silverado
Outlets and switches: Legrand Radiant
Pink sink: Thermocast
Faucet: Kraus from Home Depot
Island butcher block: Lumber Liquidators sealed with Waterlox
Flooring: Lumber Liquidators maple engineered wood
Knobs: eBay
Stove: KitchenAid from Home Depot
Dishwasher: KitchenAid from Home Depot
Coffee maker: KitchenAid
Island stools: Urban Outfitters and The Classy Home 
Rug: vintage Turkish kilim from Etsy

Kitchen Progress: Appliances + Finish Details

Kitchen Renovation Stack Bond Subway TileThis post is sponsored by The Home Depot.

If you’ve wondered why I’ve been a little quiet lately, you obviously haven’t been watching my Instagram stories! (I may or may not have been oversharing all of our home renovation details over there.) Every day I’ve been doing something little, or something big, to get this kitchen a big closer to completion. Unless we’re talking about last Tuesday and Wednesday, when I wasted hours of my life painting the refrigerator wall 12 different shades of gray, only to come to the conclusion that gray is not a color I want for my kitchen. But! As my dad always says, it’s not a waste if you learned something!

kitchen shelving wall

This past week, I’ve been getting cold feet about a lot of my decisions? Why? Well, because it was time to make the decisions a reality, and I’m simply terrified of committment when it comes to these big home design decisions. I found myself overcome with doubt about my plan for the wooden shelving wall I was getting ready to work on this weekend. So I did some mockups, and decided I’d like the wall and shelves to both be gray. I spent a lot of time mulling over gray colors, and painting the wall with samples, and decided to go back to my original plan. But like another wise man in my life once said, just because you spent a lot of time on something, doesn’t mean it’s any good. (That was my drawing instructor in art school.)

kitchen shelving wall

So here I am, back where I started. Wood shelves. This is the area where I plan on storing my most frequently used pantry items, near the stove and kitchen island. (I do have a pantry closet, but it is tucked around the corner at the end of the kitchen.) I was worried about it looking too cluttered with the contrast of the wood shelves with a while wall behind it. But in the end, I decided the gray felt out of place in a room with no other gray, and really am drawn to the warmth of the wood tones.

The appliances I selected from The Home Depot are very sleek and modern, and I think they fit right in with the modern stack bond tile arrangement we decided on. I especially love how the white refrigerator just blends in so well with its white surroundings, yet the steel handles on the door elevate it to look like a chic piece of furniture in the space.

OUR REFRIGERATOR SELECTION:

KitchenAid Counter Depth French Door Refrigerator

– EXTENDFRESH Temperature Management System helps keep food fresh
– Interior water dispenser provides easy access to filtered water
-Produce Preserver helps keep fruits and vegetables fresh


kitchenaid counter depth refrigerator

Tonight I’m working on building a cabinet to surround the fridge which will make it look built-in, but also give me hidden storage above it. This wall is going to be so amazing when it’s finished! (Fingers crossed!)

Most of my accessories for the kitchen are either nondescript white dishes, or jars and baskets that definitely learn towards country. If I were to describe the style I gravitate towards, I would say it’s 1970s modern with Scandinavian simplicity, a little bit country (the minimally styled primitive stuff), and a dash bohemian. I really love bright, airy spaces with mostly white and neutrals, but pops of color here and there to add personality— like my pink sink! While I do love the clean and white look, I also crave the warmth of wood.

70s country kitchen accessories

We have completely changed up the island in the center of the kitchen and topped it with the a butcher block countertop we had purchased for our last kitchen renovation— we loved it so much we did it again! The countertop is a precut countertop specifically sized for island uses, and it just so happened to be the perfect fit for our island! I sealed it with Waterlox to give it the rich color, but more importantly to give it a food safe protection from water. The flooring we decided on for most of the first floor is also from Lumber Liquidators— engineered maple. Super easy to instal! I highly recommend it for an inexpensive flooring option.

The island will also be getting a built-in microwave which I purchased from Home Depot after having such a good experience with my other larger kitchen appliances. It’s white, so it’ll blend in with the island, and be easily accessible for warming up my coffee for the fifth time each morning as a mother does.

Pink kitchen sink

I still love the pink sink! And love it even more now that we have a new dishwasher beside it. I can’t even explain how excited I was to have a new dishwasher that does an amazing job cleaning my dishes! My silverware and clear glass storage containers were all cloudy from the dishwasher at our old house. Just one time through in this new one, and most of the cloudiness is already gone! Very impressed. And I like that it matches the fridge.

OUR DISHWASHER SELECTION:

KitchenAid Top Control Dishwasher in White

– PROWASH cycle adapts to achieve best cleaning based on soil level
– Heat Dry option w/ recessed heat element helps ensure dry dishes
– Fold-down tines in lower rack adjust to 1 of 3 positions


Kitchen Renovation Stack Bond Subway Tile

It’s so exciting to have my dream stove in place, and did you notice? I built a box for my hood vent, and love the way it looks! Especially now that I’ve finally started to instal the wall tile. The tile will receive a very light gray grout that will allow for the stack bond pattern to still be seen easily, but it won’t be as bold as it looks now, sans grout.

I can’t wait until this space is all finished up and I can host my first brunch, with skillets of yumminess on each of the six burners on my new KitchenAid commercial range. It’s the crown jewel of our kitchen renovation.

commercial range

OUR STOVE SELECTION:

KitchenAid Commercial Style 36″ Range

– Dual fuel combines gas cooking surface with an electric oven
– EVEN-HEAT True Convection helps keep the perfect temperature
– 20K BTU ULTRA POWER dual-flame burner ranges from high-to-low


Kitchen Renovation Stack Bond Subway Tile

This weekend we’re finishing the tiles and fridge cabinet, then next week I’m installing the floating shelves on the window wall and the wood shelving next to the fridge. After that, it’s just a few small details! (toe kicks, door and floor trim, and lighting!) Thanks for following along with me on this journey. It’s such a treat to share it with you!

If you want to check out my other kitchen planning posts, you can see where I started and some of the planning and demo details.

I acknowledge that The Home Depot is partnering with me to participate in the promotional program for appliances. As a part of the program, I am receiving compensation in the form of products and services, for the purpose of promoting The Home Depot. All expressed opinions and experiences are my own words. My post complies with the Word of Mouth Marketing Association (WOMMA) Ethics Code and applicable Federal Trade Commission guidelines.

Kitchen Progress: Ooooh We’re Halfway There!

kitchen update making nice in the midwest

This post is sponsored by The Home Depot.

So much has happened since I last shared pictures of the kitchen! I’m happy to say we’re about half way finished with this space. The big news this week is that our Home Depot appliances will be delivered! Before that, our excitement revolved around new Corian countertops being installed with a PINK undermount sink (that’s right!) and a butcher block island top from Lumber Liquidators.

You know things are looking up when you can make coffee at home, but not only that— your pink coffee creamer carton matches your sink!

kitchen update making nice in the midwest

While I really enjoyed the industrial coiled-pull-down style of our last sink’s faucet, I decided to get something more sleek and easy to clean. (The last faucet was perennially dusty and difficult to clean around the coils.) The faucet I chose for our new kitchen is elegant, but design-wise it’s understated and lets the pink sink take center stage. I can’t wait to see this area with the tiled backsplash in place! We chose this wide 3×12 subway tile that we’ll lay in a modern stack-bond pattern with off-white grout. We’ll lay that after the appliances are installed and after I’ve built the box around our hood vent. (More on that later!)

Just a reminder of what this space used to be! The first thing we did when we moved in was to take down cabinets and rearrange them to better suit our needs for the space. The cabinets we aren’t using in the kitchen anymore are being repurposed in the garage and basement. The style is not my choice for cabinetry, but I wanted to use what we had if at all possible, and I didn’t feel like the lower cabinets were cramping my style too badly. So they stayed!

As you can see in the floor plans below, we gave the eat-in-kitchen more space to serve as our main dining area, as well as removed all of the large cabinetry on the entry wall. Then we drywalled in a pantry where the butler’s cabinet use to be. (It used to have a wet bar inside!) I will be building a wall of shelving to act as an open pantry system for prettier things (like dry goods in jars as well as serving bowls and pitchers), but that will be the last of the details I finish in this space.

kitchen update making nice in the midwest

This is how the space looks now. We’ll lay maple engineered hardwood flooring for starters, but with the addition of doors, trim, appliances, lighting, and finishing details like shelving and tile, this space will look pretty close to my original renderings

kitchen update making nice in the midwest

Above is the wall where the open shelving system will go. The verticals of the shelves will anchor into each stud in the wall, and then I’ll instal horizontal shelves that will go above the doorway too, to completely surround the entry to the kitchen. I think it will be quite cozy and the perfect way to balance out all of the white in this space!

kitchen appliance trends

I spoke last time about my thought process behind selecting appliances for the kitchen. I’m fortunate to be working with The Home Depot on appliances for the space, and true to Mandi form, I began my hunt by searching online. I knew I wanted a slide-in range and counter depth refrigerator. I was able to narrow the search parameters to view only those models, and selected these two models based on looks and reviews. My favorite part about shopping online (besides the fact that I can do it at midnight) is being able to confidently make decisions based on the experiences of those who have gone before me. :) After deciding on the two appliances that mattered most to me (fridge and range), I selected a dishwasher to match. Thankfully the one that matches is also well reviewed, or I may have selected a different model. But from what I’ve seen and experienced, KitchenAid is a great brand I can trust.

Before I placed my order, I did go into a Home Depot store to check out the appliances in person. I was able to see the dishwasher and counter-depth refrigerator I chose, but they didn’t have the commercial range in store for me to check out. But obviously it’s a dream range that I’ll be happy to have in our kitchen! I had been worried about the stainless steel handles on the fridge I liked (not trying to clean smudges all day long), but in store I was happy to see that the handles are etched and not prone to smudging!

Here are the appliances I chose:

All Home Depot appliance orders over $396 come with free shipping, and I was able to select my delivery date online, along with appliance installation and hauling-away of our old appliances. After weeks of deliberating, everything was ordered within 5 minutes. So excited for their delivery this week!

kitchen update making nice in the midwest

kitchen update making nice in the midwest

I also decided to upholster the tops of my counter stools with this vintage fabric which reminded me of my parents’ bad velvety sofa from the ’70s. Stool cushions are the perfect little spot for a nostalgic pop of funk like this, and will add a soft touch to a mostly white room. I love that they’re the first thing you’ll see when you want into the room!

Thanks for following along with me on the journey! My next kitchen update will hopefully include a finished backsplash and my gorgeous new lighting. Wish me luck!

I acknowledge that The Home Depot is partnering with me to participate in the promotional program for appliances. As a part of the program, I am receiving compensation in the form of products and services, for the purpose of promoting The Home Depot. All expressed opinions and experiences are my own words. My post complies with the Word of Mouth Marketing Association (WOMMA) Ethics Code and applicable Federal Trade Commission guidelines.

 
 Older