Moxie Jean Kids – Get the Look for Less

Back to School time was so thrilling when I was a kiddo. Every late Summer afternoon, when other normal kids were running through sprinklers or begging their parents for ice cream truck money, I watched excitedly as the mail truck slowly approached from the distance— Would today be the day I get my class list? As I wondered which friends (and which boys) would share a classroom with me that Fall, I would pour over clothing catalogues, wishing Mom would puh-lease buy me all the clothes I wanted, instead of just giving me a set allowance for Back to School clothes. As a sixth grader, I would grab a calculator and crunch the numbers so I could get the most clothes for the money I had to spend, making sure I had a bomb outfit for the first day of school. These were important decisions, you guys! I probably wouldn’t get new clothes again until Christmas, and even then I would be more likely to get tube socks and patterned undies instead of the corduroy flare jeans and the flower-power zip-down shirt that I really wanted.

I wonder if Lucy will one day get as excited about Back to School shopping as I did. She might not be in school just yet (Let’s not rush it!), but I still bought her some new clothes in the spirit of this time of year. Just like my six-grade self, I pulled out my calculator and crunched the numbers so I could get her the most for our money. I ended up buying Lucy all of these name brand clothes for less than $40, and I didn’t even have to leave the house! What’s my trick? Moxie Jean, the upscale resale shop for kids— online!

I pride myself on being pretty thrifty, but my desire to save money usually clashes with my annoyingly specific style requirements. I rarely bother looking for clothes at garage sales, because most of the time the things for sale are nothing at all like the classic, vintage-inspired clothes I like for Lucy’s wardrobe. Typically I find most of her vintage clothes at local thrift stores, but it can be frustrating to spend a long time looking through clothes that are tightly smashed onto racks alongside tacky t-shirts and over-appliquéd dresses. It’s rare that I leave the thrift store with more than one simple white t-shirt for Lucy. I also like to look around at local resale shops, but there’s still a lot to sift through while corralling an active toddler who would rather be playing outside.

I really liked my experience shopping at Moxie Jean. It’s just like any online store where you can view things by a variety of categories, the clothing is neatly displayed on a simple background, and it arrives well packaged and in pristine condition. But instead of the online shop prices, I paid about 75% less than retail for the brand name clothes I found. (Honestly I don’t care too much about brand names— I look for specific styles. Brand names like Boden and Gap just make it easier to skip to clothes I know I’ll like!) I ended up finding lots of dresses, jumpers, shirts, and jeans that I wanted to get for Lucy when browsing Moxie Jean’s 18-24 month girls category, but I narrowed down my purchases to the items below:

Black turtleneck originally from Old Navy

Gingham skort from The Children’s Place

Plaid jumper originally from Old Navy

Orange marled sweater originally from Jacadi

Red gingham pants – Deréon brand

This year, the National Retail Federation estimated that shoppers will spend an average of $231.30 on clothes and $124.46 on shoes. Moxie Jean can give you at least three times as much plunder as you’d get at retail stores, and to prove it, they cut the estimated total of $355.76 in half and they’re giving it away to one lucky winner to buy a new wardrobe.

Enter the giveaway below, and read more about Moxie Jean at their website here!

a Rafflecopter giveaway

This is a sponsored conversation written by me on behalf of Moxie Jean. The opinions and text are all mine.


Sew Your Own Custom Back-Wrap Top

Make your own sewing pattern for a custom wrap top. Step by step photos of sewing process included!

Ready to get your sew on? If you liked the back-wrap top I shared last week, then check it— I’m back with detailed instructions! I hope you won’t be too intimidated to give it a go. If you’re worried about making darts, you can start out with a knit fabric instead of something woven. And you don’t have to make it reversible, but then it would only be half the fun. Point is: You make the rules! If you do make your own, though, just do me one little favor. Link it up, babies!

Make your own sewing pattern for a custom wrap top. Step by step photos of sewing process included!

Make your own sewing pattern for a custom wrap top. Step by step photos of sewing process included!

Step One: Find a shirt that fits closely (but doesn’t stretch) to your figure. Transfer its shape to a piece of kraft paper by poking holes along its border with straight pins. You may also chose to trace the shirt with a fabric pen.

Step Two: Trace the pinhole outline with a pen, cropping the shirt at its natural waist. It’s better to crop it longer than you may eventually want it and you can trim it down later. Add a 1/2″ border to the outline for hem allowance. Then Cut out the piece of paper.

Make your own sewing pattern for a custom wrap top. Step by step photos of sewing process included!

Step Three: Trace the pattern from step two, and indent the outline of the 1/2″ hem allowance. Find the middle of the piece between the armpits.

Step Four: Draw a curved line from the inside, top of the shoulders to the waist, just about 3-4″ from the bottom. Make sure the line you draw intersects the middle point you marked in step three. Cut out the paper along the curve, flip the paper up-side-down and trace it to create the other side of the back.

Make your own sewing pattern for a custom wrap top. Step by step photos of sewing process included!

Step Five: I got a little creative with the neckline by making a ’50s style v-shape. I also created extension pieces for each of the back wrap pieces, each measuring 19″ in length. I decided on their length by having a friend hold ribbon pieces at my waist, tying them comfortably at the front of my waist, and trimming the excess ribbon. Each piece measured 19″ long.

Make your own sewing pattern for a custom wrap top. Step by step photos of sewing process included!

Step Six: Pin the pattern pieces onto your both layers of coordinating fabric and cut out each piece. Make sure as you stack the coordinating fabric that the right sides are facing each other or away from each other. I laid out my pattern pieces on the bias (diagonally) so the fabric would stretch a bit against my curves. I was able to get the back wrap pieces and their extensions all in one piece, instead of cutting out the extensions separately and connecting them.

Make your own sewing pattern for a custom wrap top. Step by step photos of sewing process included!

Step Seven: Begin the process of making bust darts by finding the middle part of the front piece. Then measure out 4″ from the middle point on each side. This is the measurement I used to make my darts after holding the fabric to my body and judging where they should go.

Make your own sewing pattern for a custom wrap top. Step by step photos of sewing process included!

Step Eight: Measure 1.25″ out from the points you just marked in step seven. This will be the width of your darts.

Step Nine: Place a dot in between the two dots from step eight, then measure up 5″. Connect the dots to create the lines for the darts.

Make your own sewing pattern for a custom wrap top. Step by step photos of sewing process included!

Step Ten: Create darts using a similar technique on the sides of the front piece. Again, I measured my darts according to my own body, but if you are similar to me, you may want to measure 5″ down from the armpit hole for the top line of the dart. Then go down 1.25″ for the bottom line of the dart. The point of the dart was positioned 1″ above the point of the bottom darts, as shown in the above image. Connect the top, middle, and bottom lines of the dart to the point.

Make your own sewing pattern for a custom wrap top. Step by step photos of sewing process included!

Step Eleven: Iron the darts so that the crease is right at the middle line of each dart. Then stitch along the outside lines of the darts. Then Iron them flat.

Make your own sewing pattern for a custom wrap top. Step by step photos of sewing process included!

Step Twelve: Begin assembling the top by placing the back wrap pieces face-to-face onto the front piece. Pin along the shoulders and sides and stitch together, 1/2″ from the edge. Then iron the hems flat to prevent bulk when assembling the entire pieces in the next step. You may be able to see that I also sewed darts into the back wrap pieces for an extra fitted design, but it’s really not necessary due to the wrap style.

When you are finished connecting the pieces, make sure it fits you properly. If it doesn’t, you’ll need to make the proper adjustments before continuing.

Make your own sewing pattern for a custom wrap top. Step by step photos of sewing process included!

Step Thirteen: After you’ve completed steps 1-12 with a coordinating fabric (make sure the patterns don’t show through each fabric), fit the pieces together carefully, face-to-face. At this point you are checking to make sure the armpits and shoulders match up. This is why you need to cut both fabrics at the same time and stitch precisely 1/2″ from the edge of the fabric. If they don’t match up at this point, you will need to rip out the hem and correct the fit of one of the pieces.

Pin together the pieces along the neckline, reaching all the way to the ends of the wrap extension pieces. Then stitch 1/2″ from the edge.

Make your own sewing pattern for a custom wrap top. Step by step photos of sewing process included!

Step Fourteen: Cut little slits along the neckline and other curved areas where you have stitched. This will prevent puckering after you flip the piece right-side out.

Make your own sewing pattern for a custom wrap top. Step by step photos of sewing process included!

Step Fifteen: Now pin along the bottom edge of the two pieces and stitch them together everywhere except along the front. This open part is where you will flip the piece right-side-out in the next step.

Make your own sewing pattern for a custom wrap top. Step by step photos of sewing process included!

Step Sixteen: Now you can flip the top right-side-out through that opening you left in the previous step. Use a capped pen to help you with the pointy ends of the wrap extension pieces. Now iron along the hems to flatten it out. Flip under the open section of the front and iron along with the rest of the bottom hem.

Make your own sewing pattern for a custom wrap top. Step by step photos of sewing process included!

Step Seventeen: Pin along the opening of the front, where you just ironed, and then stitch it closed, very closely to the edge of both layers of fabric.

Make your own sewing pattern for a custom wrap top. Step by step photos of sewing process included!

Step Eighteen: Cut little slits long the armholes to prevent puckering after finishing them.

Make your own sewing pattern for a custom wrap top. Step by step photos of sewing process included!

Step Nineteen: Fold under the fabric along the armholes, ironing as you go along. Work one fabric side at a time.

Step Twenty: After each fabric side has been folding under at the armpit holes, each fabric side’s edge matching up, pin the two faces together and then stitch very closely along the edge.

I hope to get a lot of wear out of this top through the Summer— with high waisted shorts, skirt, and even over top of dresses. Yep, it’s a suitor!

Win a Canvas Shopper or Diaper Bag

Making Nice in the Midwest Diaper Bag Giveaway

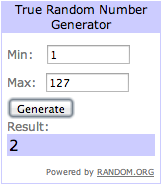
Thank you to everyone who checked out the Baby Highpants Etsy shop! I used Random.org to generate a winner for the Poppy bag giveaway, and Mallory was the lucky gal who won! If you didn’t win, don’t forget the 20% off code that’s good for one more week at Baby Highpantsmidwesthighpants

Lucy and I teamed up with the kind folks of Baby Highpants to bring you a very special handmade giveaway. Whether you need a bag for stashing bottles and diapers, or just a classic shopper or messenger bag, Baby Highpants has a really nice selection of colors and styles for both men and women. I’ve selected this customizable Poppy bag for one reader to win! Check out the details below— Who knows? It could be your lucky day!

Making Nice in the Midwes

Making Nice in the Midwest Diaper Bag Giveaway

Please comment below for a chance to win! The winner of the giveaway will receive their own customized version of the Poppy bag in either the large diaper bag size or medium size (shown here with pockets suitable for a diaper bag). The bag will also come with a changing pad and stroller clip if you’re using yours for a diaper bag. Pretty nifty! I’ve been enjoying using my medium bag for Lucy’s cloth and disposable diapers, plus I can still fit my own things and a little sweater for Lucy. It’s just big enough without feeling like I’m carrying around a baby duffel bag!

Curious about how the bags are made? Check out the process photos on Baby Highpants’s Facebook page here. Peep the bags on Instagram too!

If you don’t win the giveaway but are still interested in snagging a Baby Highpants bag to call your own, they’re offering Making Nice in the Midwest readers a special 20% discount for two weeks! Use the code midwesthighpants during your checkout to apply the discount.

Good luck! I’ll be posting the randomly selected winner this Friday.

Making Nice in the Midwest Diaper Bag Giveaway

Making Nice in the Midwest Diaper Bag Giveaway

Making Nice in the Midwest Diaper Bag Giveaway

Making Nice in the Midwest

 Older