DIY | Hand-Written Poster Project

I’ve really been loving all of those hand-painted looking posters out there. You know, the ones with a message that makes you chuckle or words of wisom that make you think. Part of the beauty of posters like this is their textural quality. I was able to get a similar look by hand writing this verse very small with a gel pen, then blowing it up on a copy machine, and eventually inverting the colors. I love the faded look of the toner-print quality, and the rugged edges of each word. Want to make your own? I’ll show you how!

S U P P L I E S :
  • small piece of white paper
  • gel pen (the globbier, the better!)
  • pencil
  • scissors
  • picture or poster frame

1.) I started out by writing on a 1.75″ x 2.5″ section of white paper, practicing a few time to make sure I got the spacing and proportion how I wanted it. Then, I went over the words again, letting by pen linger on certain spots to get a globby look that you might expect from a quill pen. (By the way, if you have a quill pen- it would be probably be perfect!)

2.) Then I took my little note to the copy shop (Office Max) and enlarged it on the standard copy machine, starting with 400% and then inverting the colors (in the print options of the black and white copier) and enlarging it again by 180%, or until it was fitting properly within the 10×13″ frame I had brought along. I did try a few different sizes, since each copy only cost me nine cents. I ended up keeping this print for the 10×13″ frame, but then make another larger print which you see photographed below. To do this, I took my inverted 10×13 print to the plotter at the copy shop and enlarged it by 162%, making sure it fit perfectly in my 16×20″ picture frame.

3.) I then laid my picture frame over the print, and traced around the edges with a pencil. I trimmed a little outside of the pencil line, to make sure I didn’t have any gaps when putting it all together. After assembling the glass, paper, and cardboard of the frame, it was ready to hang!

I love this simple technique, and will probably try it again with different writing utensils. I think this would make a great house warming gift, though, just as it is!

SEWING DIY | Quilted Color-Block Hot Pads

Do you have loads of fabric scraps haunting your memory and stealing all of your craft storage space? Oh… right… neither do I. Okay, okay! I do! Loads and loads! Sometimes I want to throw my monster fabric scrap collection into the trash, but I know how much I would miss the selection when I want to do small projects like this.

I like to add something handmade to wedding gifts I give these days, so I thought I would transform some of my fabric scraps into stylish hot pads for the newlywed’s kitchen. Want to make your own quilted hot pads to give or use in your own kitchen? It’s super easy if you have access to a sewing machine. Here’s what you will need:

  • two coordinating colors of scrap fabric
  • fabric scissors
  • sewing machine and thread that contrasts with fabric colors
  • straight pins
  • thin/lightweight quilt batting (wool or another natural fiber)

1.) Decide how large you want your hot pad to be. Maybe measure one you already own and like, and then add 1.5 inch to the height and width for seam allowance (1/2″ all around, including where your triangles will end up meeting), and make sure you find fabric scraps big enough to use.

2.) Cut two coordinating colors of fabric in the size you decided you need, making sure they’re exactly square (use a cutting mat  or a paper template if necessary) and the same size.

3.) Fold your fabric squares on the diagonal, and slice them in half with sharp fabric scissors. Just like a grilled cheese sandwich!

4.) Placing the right sides of the fabric together, stitch together one triangle of each color, with the longer sides being joined together, 1/2″ from the edge. Iron flat the seam if you like (I did!). Do this to all four triangles, creating 2 squares.

5.) Cut out a square of thin quilt batting fabric to the size of your stitched-together square. Then, stitch the batting to the wrong side of one of your squares, 1/4″ from the edge.

6.) Place the right side (not the batting side) of the square you’ve just made to the right side of your remaining fabric square (this will leave the batting on the outside), and pin together the two squares to make sure they don’t shift while sewing. Now, stitch together 1/2″ from the edge of your squares, leaving a couple of inches open on one of the sides, so you can then flip the squares right-side-out.

7.) Now, flip the squares right side out through the hole you have left, using a pen tip or some kind of long, thin object to properly push out the corners. You’ll have that 1-2 inch section that is still open, but we’ll take care of that in the next step.

8.) Now, time for quilting! Start the lines of your quilted hot pad as a 1/4″ border around the edge. Make sure the unsewn, open portion of your edge is flipped inward like the rest of the hem (use pins to secure if need be), so that when you stitch around the border, the opening is sewn shut.

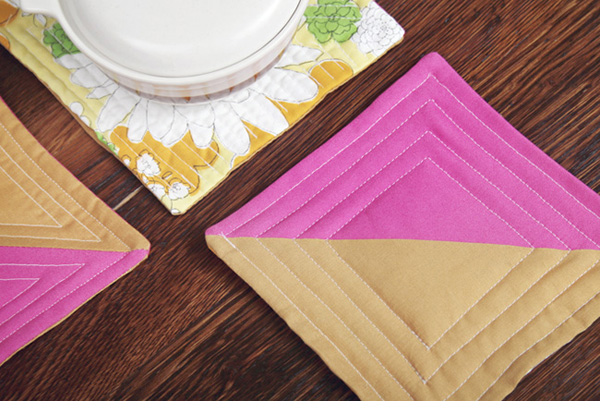
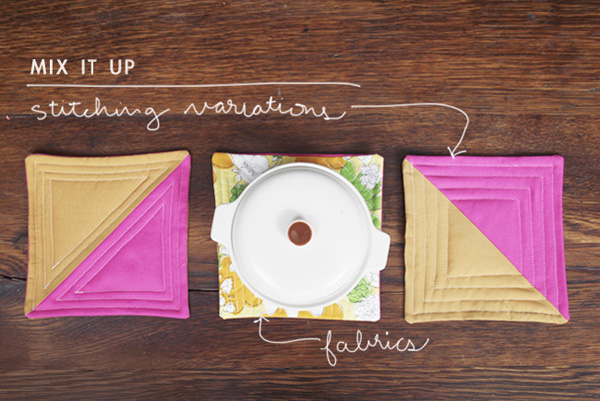
9.) After sewing a border around the edge, you can stitch a pattern however you like on your hot pad! I tried a few different patterns, but I think my favorite is the concentric squares that leave one big square in the center (see image directly below).


DIY | color-block recipe box

Friends of mine were beginning their new lives together, and I wanted to come up with a creative gift for their wedding. So, I put together some kitchen items, wrote out a few of my favorite recipes I knew they would love, and stuffed them into this customized recipe box with a grocery store gift card. I enjoyed making the gift so much, now I think I need one for my own kitchen!

Making the box is super easy, and can be fun to do with older kids, too! It just takes a little time to wait for each coat of paint to dry. But if you’re like me, you can always find little things (like Pinterest dusting the house) to fill your time between coat drying sessions.

Here’s what you will need:

  • wooden recipe box (I found mine at Joann & used a 50% off coupon!)
  • primer or gesso
  • two sister colors of acrylic craft paint
  • artist’s paint brush
  • tacky glue
  • three-dimensional letter stickers (I used Subway stickers from American Crafts)

1.) First, arrange your word (“recipe”, or you can get creative here) on the front of the box, making sure each letter is spaced well. Then pull up each letter and glue it to the box. You don’t want to rely on just the sticker’s own adhesive, since this box might get man handled throughout its lifetime.

2.) After the glue has dried, prime all of the areas of your box that will receive paint- the letters included! I ended up needing two coats of gesso to cover up the letters completely. This part is important, because you want the paint to last forever. (Note: I liked using gesso as a primer, because it was thick and could be globbed along the edges of the letters, making sure no gaps or cracks would appear between the letters and the box.)

3.) After the primer has completely dried, it’s time to paint! I always like to paint the darker color on the bottom, and the brighter or lighter color on the top. Objects just seem better visually weighted when you order the colors this way. You can choose to use painter’s tape to help keep the paint where you want it, or you can just be a meticulous painter. It’s up to you!

It’s that simple, folks! Now you have a fresh, modern way to store you favorite food ideas.


 Older